Hur man använder DMX 512 Controller Programming Software?
Our DMX-kontroller has SD card offline working model and PC online programming working model. In this post, we will introduce how to use our programming software and will give an example at the end.
Operating system requirement:
Win7/Win10, 32 bit/64 bit.
1. Connect hardware
First, chain all the lights together by DMX cables and connect the first light to DMX1 port of the DMX controller. At the same time, connect the controller to the computer by USB cable.
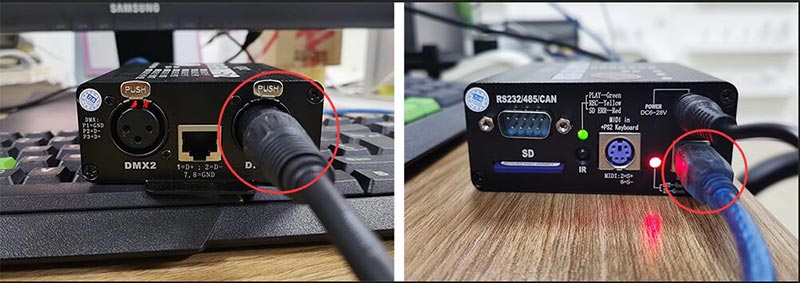
The driver will be installed automatically when the system finds the device.
2. Run software FQ512-EN.exe
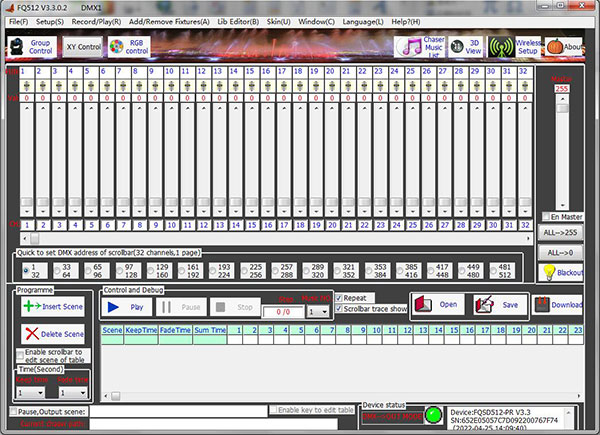
3. Create a Fixture Library
1> Click menu Lib Editor->Open Lib Editor.exe and a new window will pop up as below.
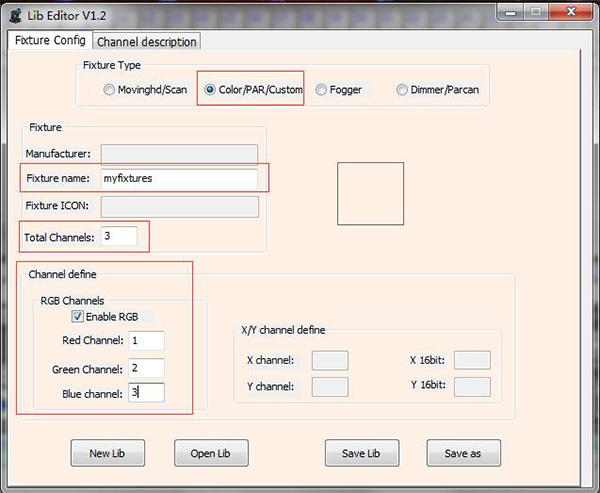
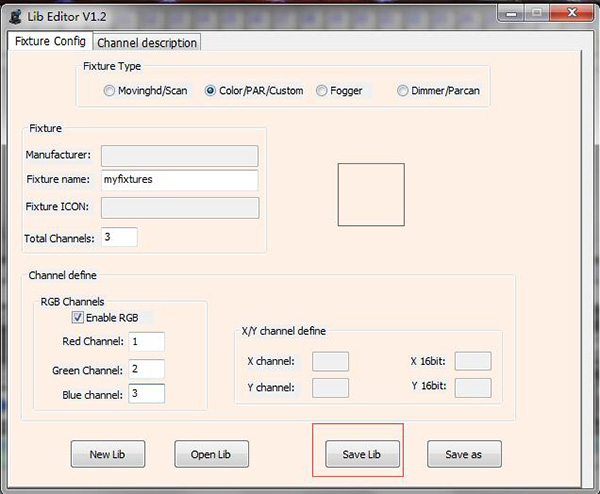
2> Select Color/PAR/Custom fixture type. Fill Fixture name, such as myfixtures. Set Total Channels to 3 (For RGB fixtures, it should be 3. But for RGBW fixtures, it should be 4).
On the field of Channel define, enable checkbox Enable RGB, and set Red Channel to 1, Green Channel to 2 och Blue Channel to 3.
3> Click tab Channel Description on the top of this window, set different icons for the channels as below.
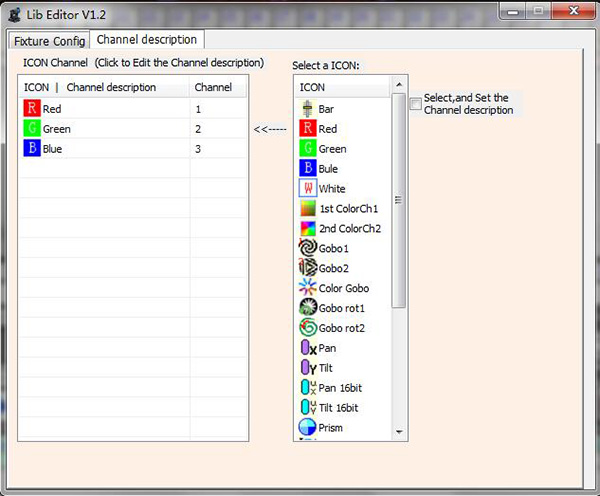
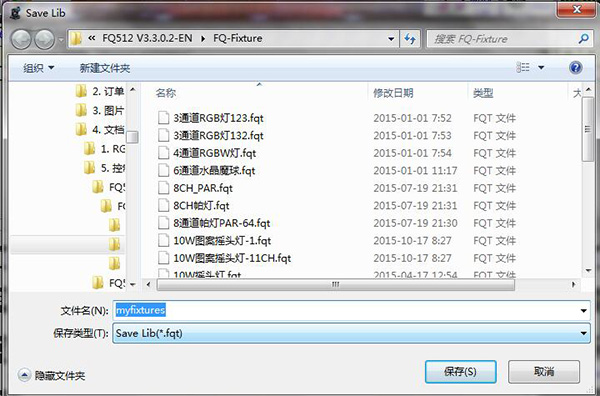
4> Don't close this window and change back to tab Fixture Config, click Save Lib on the right bottom.
4. Add Fixtures
1> Click menu Add/Remove Fixtures(A)->Add/Remove Fixtures, a new window will pop up.
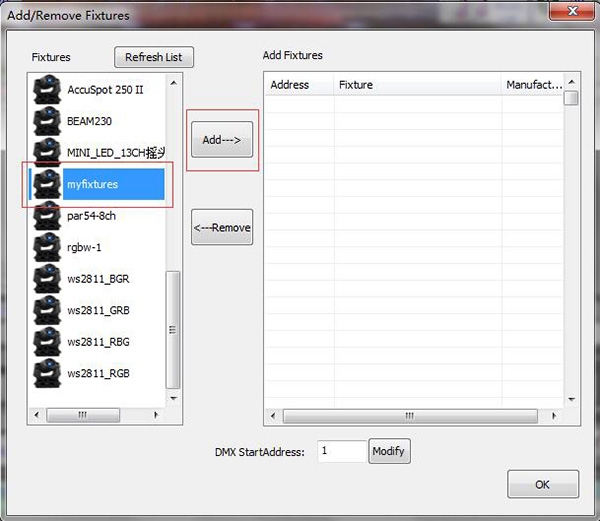
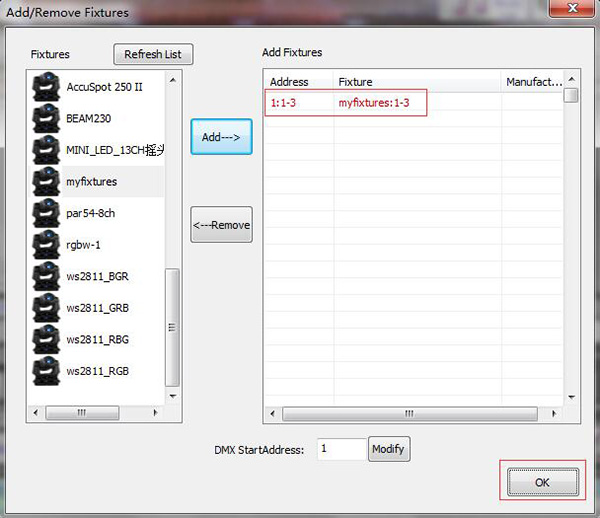
2> On the left field, choose myfixtures that we created just now, and click Add button on the middle. A new window will pop up.
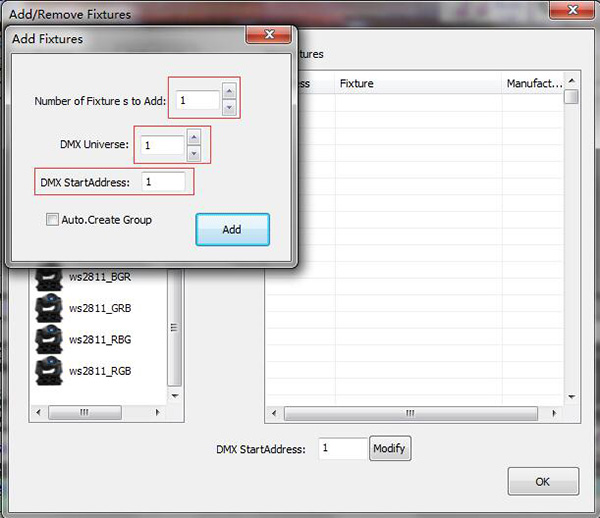
3> Set the Number of Fixtures to Add to the actual quantity of the light fixtures(here we set 1 for example). Set DMX Universe is to 1 and DMX StartAddress to 1 as well(It should be according to the actual start address of the fixtures, normally the start address of our fixture is 1). And finally click Add button.
The fixtures' names and their addresses will be shown on the right table of the window. Finally click OK button.
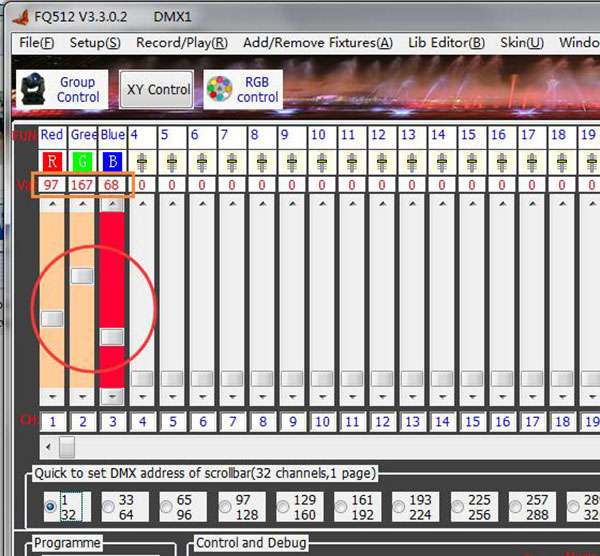
After we add the fixtures, on the top left of the software, each channel will be shown as below (channel 1 is Red, channel 2 is Green, channel 3 is Blue). Now you can adjust the colors of the fixtures by adjusting the slide bars.
5. Customize a scene
Now let us customize a scene for demonstration.
Demonstration Scene: RGB fading effect. Each color will be showing for 3 seconds, and the fading time for each color is also 3 seconds.
1> Set R :255, G:0 and B:0 by using the slide bars. On the field Time(Second), set the Keep time to 3 och Fade time to 3 too. Click Insert Scene button.
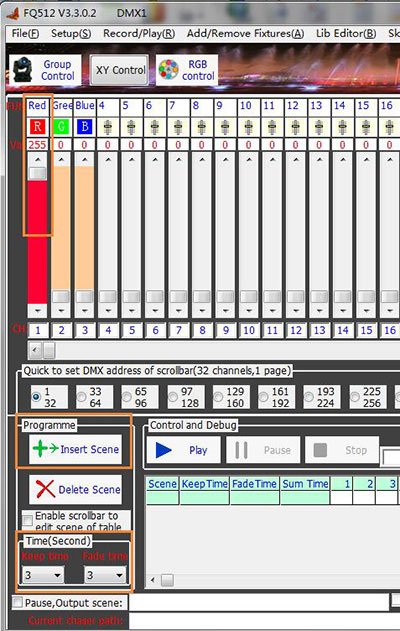
After inserting this sub scene, you will see it on the table that is on the bottom of the software.
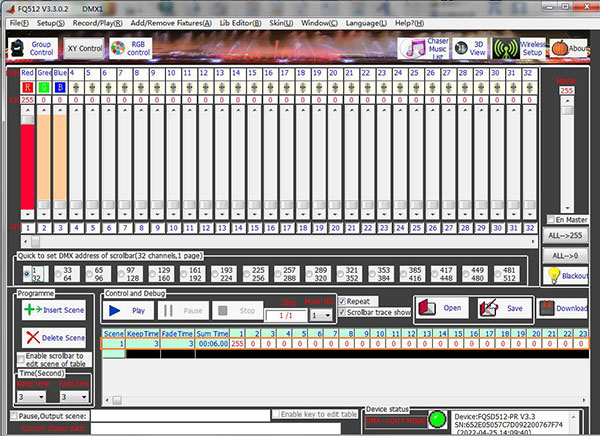
2> Set R :0, G:255 and B:0 by using the slide bars. On the field Time(Second), set the Keep time to 3,and Fade time to 3 too. Click Insert Scene button. You will see the sub scene 2.
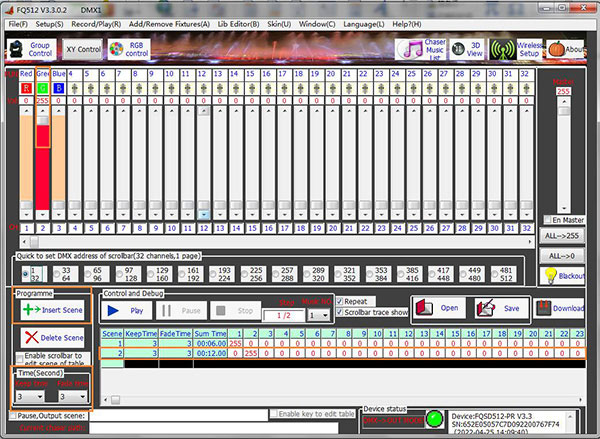
3> Set R :0, G:0 and B:255 by using the slide bars. On the field Time(Second), set the Keep time to 3,and Fade time to 3 too. Click Insert Scene button. You will see the sub scene 3.
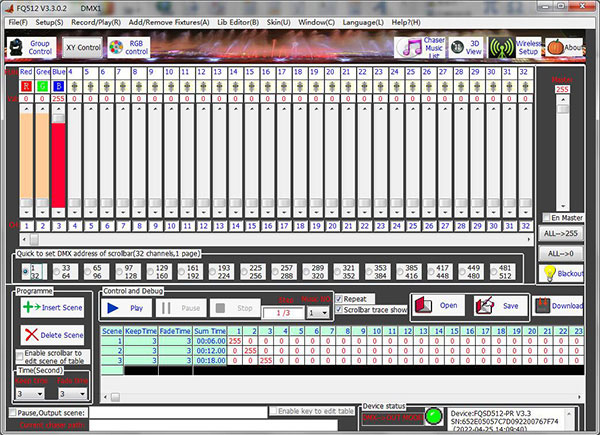
4> Let us click Play button to run the scene, you will see the effect of fixtures.
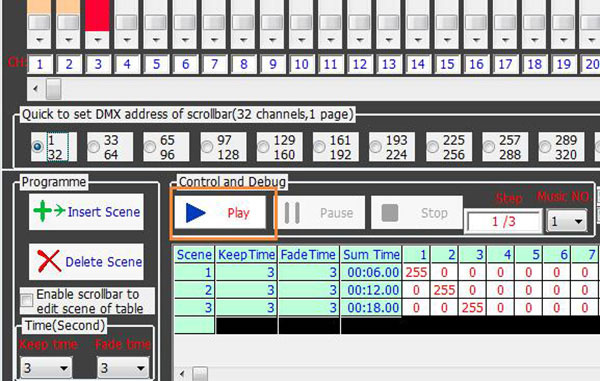
5> Save the scene finally.
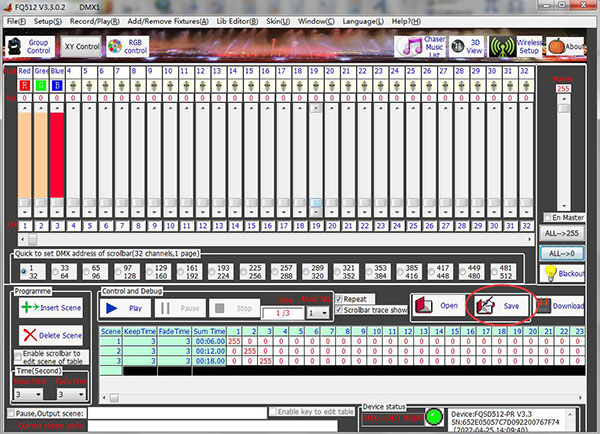
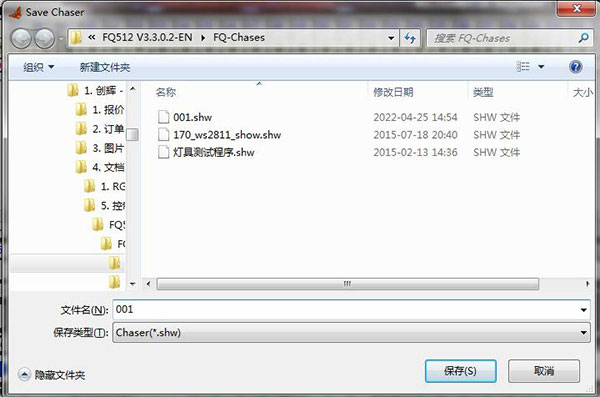
The file name should be 000 to 999. It will be added with postfix .shw. You can copy this file to the Show folder on the SD card of the controller. And you will be able to choose this scene by using the remote control of the controller when it runs in the SD card offline working model.
Tips:
If you have multiple fixtures needed to be set with the same color, you can use Group Control function.

Vidare läsning:
- Vad är DMX eller DMX512 Lighting
- Vilka är funktionerna hos DMX-dekoder och DMX-kontroller?
- DMX Controller Manual (SD-kortmodell & PC Online-modell)
- Hur man skriver adresser för DMX LED Flood Lights?
- Hur man ställer in ett trådlöst DMX LED Flood Light System?
- DMX RGB LED-ljuskatalog
- High Power DMX RGB LED Flood Light 100W 200W 300W 500W 800W
- DMX RGB LED Flood Light 100W 200W 300W (fyrkantig form)
- DMX RGB LED Flood Light 10W 20W 30W 50W
- Fjärrkontroll RGB LED Flood Light 10W till 50W
- DMX RGB LED Wall Washer Light 18W 24W 36W 72W 108W 150W
- DMX RGB LED undervattens-/fontänljus

